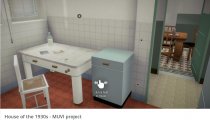
Today we have released on Sketchfab a couple of rooms…
How to: a sealing wax stamp animation in Blender
If you are having problems, please use this link
In this tutorial you are going to discover how to:
- use fluids for dropping sealing wax
- manually animate the spreading of the wax
- use modifiers to impress a seal
- define a realistic wax effect
Are you longing to get a result similar to the one presented in our demo video?
If we have managed to put up a good tutorial, you should be able to. Otherwise, contact us, and we will apologize for our poor communication skills.
Let us start.
Drops
First of all we created 3 UV spheres with different size and shape. One of the spheres was a little bit sculpted in order to modify its shape.  The fluid coming from the spheres is initialized with three different starting speeds. The first and second wax drops move a little bit up, along the Z, before going down. In this way, we simulate a diachronic fall.
(A possible solution with a movement of the spheres in the domain was discarded as deemed unsatisfactory)
Plane
The plane is set as an obstacle. Its parameters are shown in the image (no slip). Both plane and spheres are Fluid (physics)
Fluid
- In order to simulate the wax density: base 2, exponent 3 in the viscosity parameters
- For avoiding excessive spreading of the wax on the paper: Slip type -> no slip
- To obtain a Slow motion effect: Speed 0.3
- After several attempts we discovered that the parameter that suited us better for the Real World Size is 0.4 meters for the domain
- To obtain a wax-style fluid Smoothing is set at 4
Bake a test simulation with a final resolution of 100-150 to see if there is something wrong. When you get a first result of the wax spreading correctly, bake the definitive version with a final resolution of 200-400.
Now that the wax is on the paper we want to smooth it even more, so we add a Corrective smooth modifier with parameters:
- Only smooth
- Factor between 1-1.2
- Repeat at 50-80
When the simulation slows down, stop the animation (for example at frame 220) and duplicate the wax object. Press “Esc” for keeping it still and put it on another layer. To fix the copy and transform it into a mesh with that shape, apply the Fluidsim modifier.
For your convenience, re-name the two objects. We named the first one wax-sim and the second one wax-fixed.
Swapping the two wax objects
In order to swap the two objects during the animation, you have to animate the visibility.
- Place yourself where you stopped the animation earlier. In our case, at frame 220.
- Select object n. 1 (wax-sim).
- In the outliner, animate visibility and rendering as enabled by placing the mouse cursor on each relative symbol and clicking on the “i” key.
- Go to frame 221, disable them and animate as before (mouse cursor on and “i” key)
In order to show the second object (wax-fixed):
- Go back to frame 220
- Animate visibility and rendering as disabled.
- At frame 221 enable and animate them. That is, make the opposite of the previous steps
Here is a GIF presenting the entire process for swapping the objects.
Refinements with Shape keys
For concealing the swap between a moving fluid object and the static wax one we used a couple of shape keys, a suitable tool for giving the final touch to the shape of the wax drop.
In order to work on the real mesh, the corrective smooth modifier is temporarily reduced from a factor of 1.2 to a factor of 0.01.
Hence, for smoothing by hand the surface and give a faint persistency of the spreading effect, two shape keys are created: smooth and grow.
Shape key smooth – for reducing the roughness of the surface without the use of the Corrective smooth modifier, we can use sculpt with the smooth brush.
Shape key grow – by using the sculpt tool the shape of the drop is a little bit enlarged and rounded off, for simulating the last phases of the spreading of the wax on the surface. For this aim, a wide enough grab brush will do the job.
Once this phase is concluded, we can take the corrective smooth modifier back to a factor of 1.2.
Animation of shape keys
It is time to animate the two shape keys in opposition to the corrective smooth modifier by gradually reducing the modifier(from 1.2 to 0.01) while increasing the shape keys grow and smooth (from 0 to 1).
This animation starts for us at frame 221

The animation of the shape key grow will last longer in comparison to the transition occurring between corrective smooth and shape key smooth.

When the transition of the corrective smooth is concluded, by reaching a factor of 0.01, the displace animation starts, in the picture from frame 271 to 310.
Impress the seal
For the displacement animation we activate 3 modifiers:
- Subdivision surface (with levels as shown in the image);
- Displace (important is the creation of an empty for correctly positioning the seal in the displace);
- Subdivision surface (again).
At this point, animate the strength from 0 to 0,025.
Be careful with the Subdivison levels in the view because the mesh will be very heavy.
Textures
The texture is in black/white and the levels of gray define the height of the displacement relief.
For simulating the shift of the wax due to the impression of the seal, these levels are higher (i.e. whiter) near the border of the seal and soften towards a slightly darker shade of gray in the area beyond.
Shader
In the image, the configuration for the shader “wax”:
For this tutorial we used the first seal we stumbled upon (and not one of Isabelle d’Este, for which video-trailer we have this wax sealing impression done).
It happened to be from a Football Club and we hope no one will consider it as a precise stance of our Laboratory.
If you will have problems in following our tutorial, please leave your comments below and we will try to help.


